Once the iOS demo source code is downloaded and verified, unzip StrongKeyFIDODemoiOS.zip in a working location for Xcode projects. The build process is broken into sections to make it easier to follow; if helpful, print out these instructions and mark each step with a check (✓) as it is completed.
NOTE: A paid Apple Developer Account is needed to access the Associated Domain capabilities required by the application. If you don’t have an Apple Developer account, create here.
Xcode Project Setup
- Extract StrongKeyFIDODemo.zip and open it:
StrongKeyFIDODemo/StrongKeyFIDODemo.xcodeproj -
Open Xcode in the project StrongKey FIDO Demo iOS. Go to the project target’s Signing and Capabilities tab and the Team drop-down, then choose the paid Apple Developer Account team.
-
Add the Associated Domain capability and define the webcredentials service for your RP ID identifier domain:
webcredentials:example.com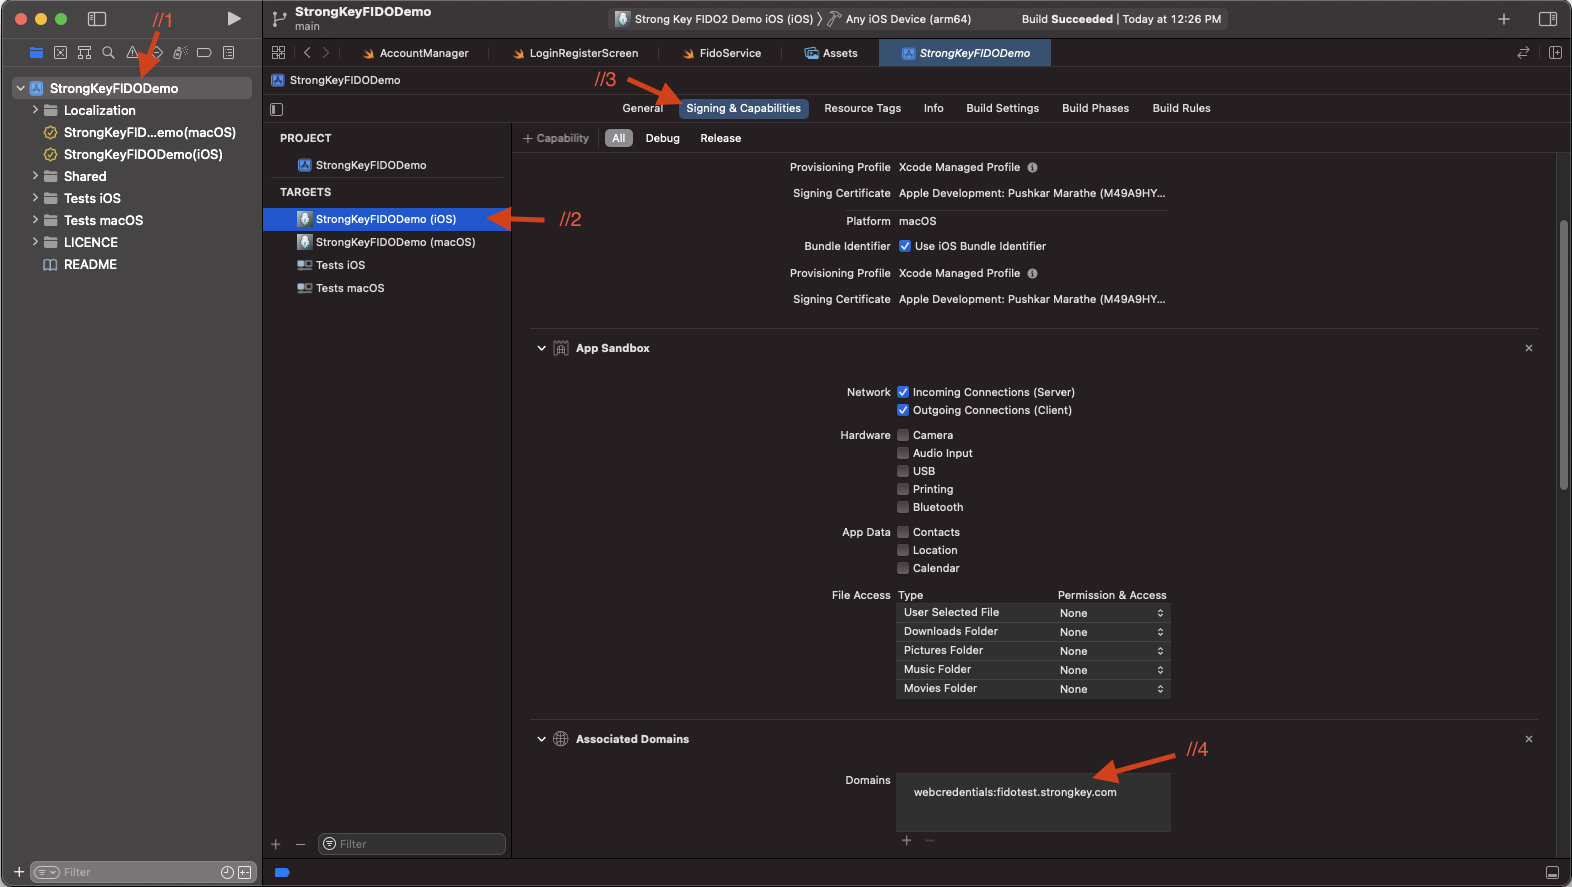
-
Get the Team ID (e.g., ABCD1EFG23) from the Apple Developer Account Page and the app’s unique Bundle Identifier (e.g., com.example.iosdemo) from the project target’s Signing and Capabilities tab in Xcode.
-
Setup the associated domain with the webcredentials service type using the Team ID and Bundle Identifier. Learn more about Associated Domains and how to implement them according to Apple’s instructions by clicking the following link:
Below is an example of how the apple-app-site-association file will look:
{ “webcredentials” : { “apps” : [“<TEAM ID>.<BUNDLE ID>”] } } -
After successfully creating an apple-app-site-association file, Save it in a secure place; later it will be made accessible via a web service URL like this:
https://example.com/.well-known/apple-app-site-association -
Enable Passkeys for the Apple device/simulator:
-
In iOS under Settings → Developer, enable Syncing Platform Authenticator
-
In macOS, choose Safari → Preferences, click the Advanced tab, and select Show Develop menu in menu bar; then select Develop → Enable Syncing Platform Authenticator in Safari
NOTE: Enable Passkeys is not required if running iOS 16 or macOS Ventura since passkeys is production in these versions.
-
Build and Deploy
The following steps download and verify the integrity of the distribution file:
-
Install SKFS using these instructions.
- Deploy FIDO Policy Backend Application using these instructions. Only the backend application needs to be deployed since this iOS application will act as the frontend.
-
Add the file apple-app-site-association created in Xcode Project Setup, Step 5, to the server's /.well-known directory so that it’s accessible from public internet like this:
https://example.com/.well-known/apple-app-site-associationNOTE: If testing locally, enable alternate developer mode for Associated Domains. Also check out this informative video for a quick overview.
-
Create a folder named .well-known in the /usr/local/strongkey/payara5/glassfish/domains/domain1/docroot at the SKFS install location and place the apple-app-site-association file there.
-
Connect the iPhone/iPad to the Mac.
-
In Xcode, choose that device as the run target.
-
Launch the app.
-
Before using the app, open the iPhone/iPad Settings → StrongKey FIDO Demo → FQDN and enter the FQDN for the server hosting SKFS and FIDO Policy Backend.