In a typical password-based authentication, a web application provides a form asking for the username used during registration and a password. Upon receiving the username and password, the web application typically passes the username and password to its authentication module. The authentication module then verifies that salting and hashing the password received for that username matches what is in the database. If it matches, it will return a success value and login the user.
In a FIDO2 authentication workflow, the web application sends a challenge to the user to sign using their Authenticator. The signed challenge is then passed back to the service provider application, which relays the signature to the FIDO2 server to verify that the challenge was properly signed using the public key stored during registration. The steps to achieve this are listed below.
-
The user completes a login form and supplies their username.
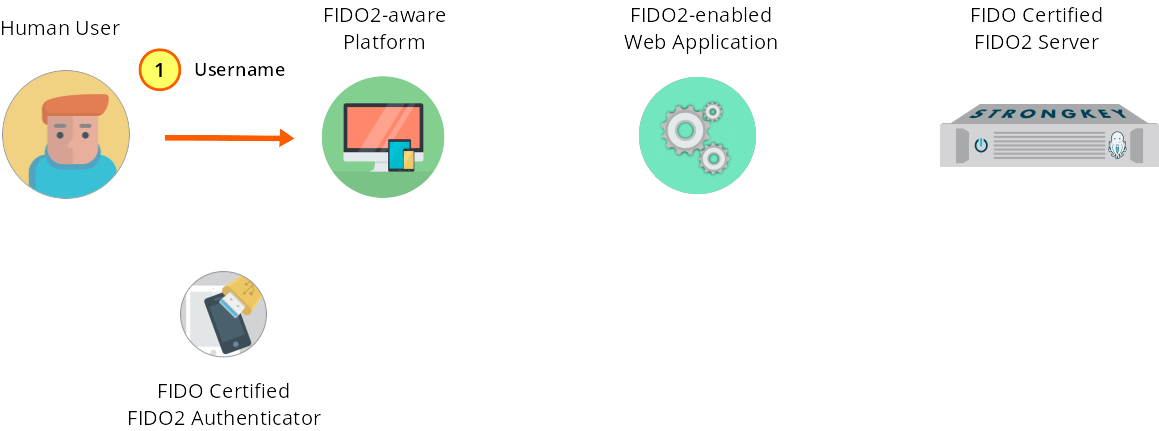
Figure 1—18: Authentication: The user supplies the username to a login form.
During FIDO2 authentication, the web application typically provides a form asking for the username; the HTML is shown here:
<div id="authPanel" class="form-panel" style="display: none;">
  <div id="authHeadingPanel">
    <img width="24" src="/img/login256.png">
    <h2>Sign In</h2>
  </div>
  <div>
    <input class="met" id="authUsername" placeholder="Username" required="" type="text">
  </div>
  <div>
    <button class="met" id="authSubmit">Sign In</button>
  </div>
</div>
-
The user submits username information to the web application.

Figure 1—19: Authentication: User submits login credentials to the web application.
Upon the user submitting the information to the web form, the service provider's web application JS front end validates the information and calls a web service—named 'preauthenticate' in the JS code to align with the SKFS preauthenticate web service—to handle the authentication process.
this.post('preauthenticate', {
  'username': $('#authUsername').val()
})
.done((resp) => {
  this.authenticate(resp.Response);
})
.fail((jqXHR, textStatus, errorThrown) => {
  this.onFailError(jqXHR, textStatus, errorThrown);
});
-
The user's username and FIDO2-enablement status is verified.

Figure 1—20: Authentication: The user's username is verified for FIDO2-enablement.
Upon receiving the username, the service provider's web application back end verifies the username has previously registered a FIDO2 key with this site. If either verification fails to pass the test, the back-end application must respond appropriately to the user. If the username is already in use and if the user has registered a FIDO2 key, the web application proceeds.
// Get user input + basic input checking
  String username = getValueFromInput(Constants.RP_JSON_KEY_USERNAME, input);
  // Verify user exists
  if(!userdatabase.doesUserExist(username)){
    WebauthnTutorialLogger.logp(Level.SEVERE, CLASSNAME, "preauthenticate", "WEBAUTHN-WS-ERR-1002", username);
    return generateResponse(Response.Status.NOT_FOUND, WebauthnTutorialLogger.getMessageProperty("WEBAUTHN-WS-ERR-1002"));
  }
-
The web application sends a preauthenticate web service request to SKFS.
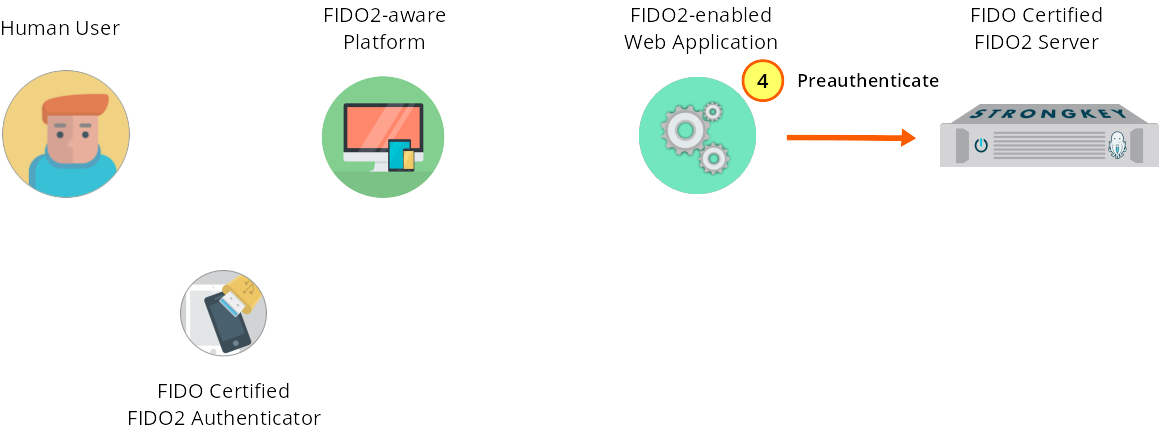
Figure 1—21: Authentication: A preauthenticate web service request is sent to SKFS.
The JSON data structure required for the SKFS preauthenticate web service follows:
{ "svcinfo": { "did": 1, "protocol": "FIDO2_0", "authtype": "PASSWORD", "svcusername": "svcfidouser", "svcpassword": "Abcd1234!" }, "payload": { "username": "This email address is being protected from spambots. You need JavaScript enabled to view it.", "options": {} } }The service provider's web application assembles the JSON data structure first and then sends a preauthenticate web service request to SKFS using the REST protocol. The Java code that performs this process is shown below.
String preauth = SKFSClient.preauthenticate(username); HttpSession session = request.getSession(true); session.setAttribute(Constants.SESSION_USERNAME, username); session.setAttribute(Constants.SESSION_ISAUTHENTICATED, false); return generateResponse(Response.Status.OK, preauth); public static String preauthenticate(String username) { JsonObjectBuilder payloadBuilder = Json.createObjectBuilder() .add(Constants.SKFS_JSON_KEY_USERNAME, username) .add(Constants.SKFS_JSON_KEY_OPTIONS, getAuthOptions()); return callSKFSRestApi( APIURI + Constants.REST_SUFFIX + Constants.PREAUTHENTICATE_ENDPOINT, payloadBuilder); } ...
private static String callSKFSRestApi(String requestURI, JsonObjectBuilder payload){ JsonObjectBuilder svcinfoBuilder = Json.createObjectBuilder() .add("did", SKFSDID) .add("protocol", PROTOCOL) .add("authtype", Constants.AUTHORIZATION_HMAC); JsonObject body = Json.createObjectBuilder() .add("svcinfo", svcinfoBuilder) .add("payload", payload).build(); ... -
In response, SKFS returns a challenge to the web application.
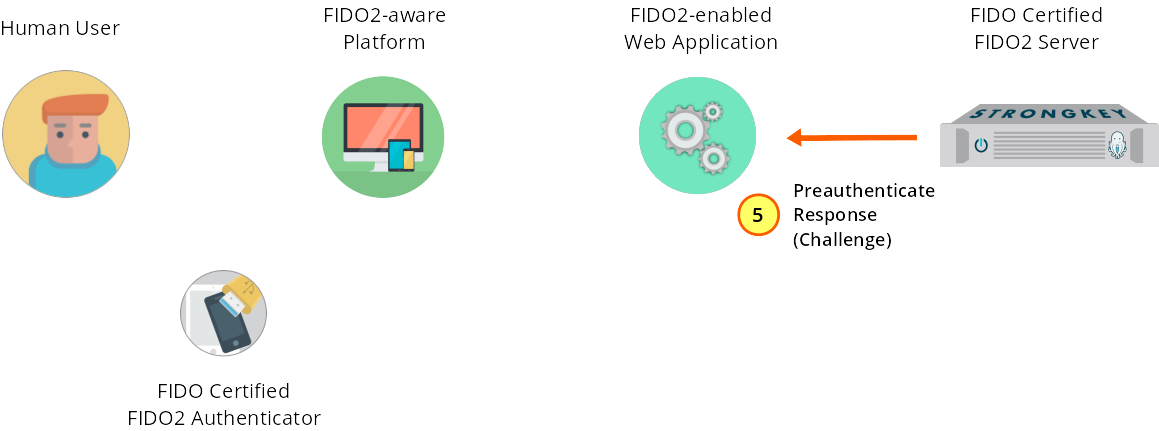
Figure 1—22: Authentication: SKFS returns a challenge to the service provider web application.
Upon receiving a preauthenticate request, SKFS confirms the user exists with a registered public key and returns a challenge to the web application. The abbreviated SKFS response is shown here (for the full response see the SKFS v3 REST API preauthenticate Example):
{
    "Response": {
        "challenge": "k1YeYZZ6HDmg3ruKinb2SQ",
        "allowCredentials": [{
            "type": "public-key",
            "id": "WLwV...CuqQ",
            "alg": -7
        }],
        "rpId": "strongkey.com"
    }
}
-
The web application back end passes the challenge to the JS code in the front end.
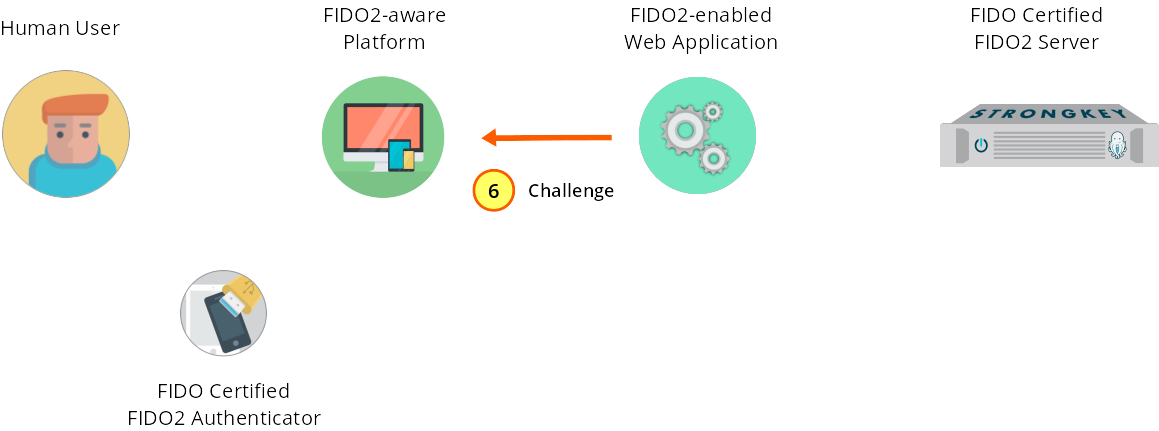
Figure 1—23: Authentication: The web application passes the challenge to the front end.
The FIDO2 Server response containing the Authentication challenge is base64url-decoded. This must be converted from the
ArrayBufferdatatype before being sent to the Authenticator:// base64url-decode fields to ArrayBuffer format. let challengeBuffer = this.preauthToBuffer(preauthResponse);
-
The JavaScript code passes the challenge to the Authenticator.
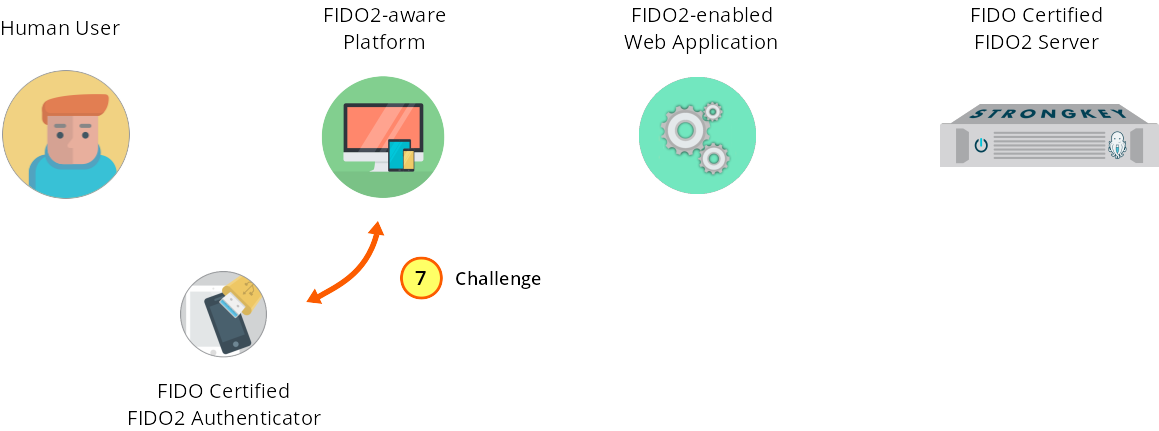
Figure 1—24: Authentication: The Authenticator receives the challenge from the JS front end.
// base64url-decode fields to ArrayBuffer format. let challengeBuffer = this.preauthToBuffer(preauthResponse); // The browser passes the challenge to the Authenticator, which requests a signature. let credentialsContainer; credentialsContainer = window.navigator; credentialsContainer.credentials.get({ publicKey: challengeBuffer.Response }) .then(credResp => { // base64url-encode the response from the Authenticator let credResponse = that.preauthResponseToBase64(credResp); this.post('authenticate', credResponse) .done(authResponse => that.onAuthResult(authResponse)) .fail((jqXHR, textStatus, errorThrown) => { this.onFailError(jqXHR, textStatus, errorThrown); }); })
-
Origin verification and test of user presence confirmation.
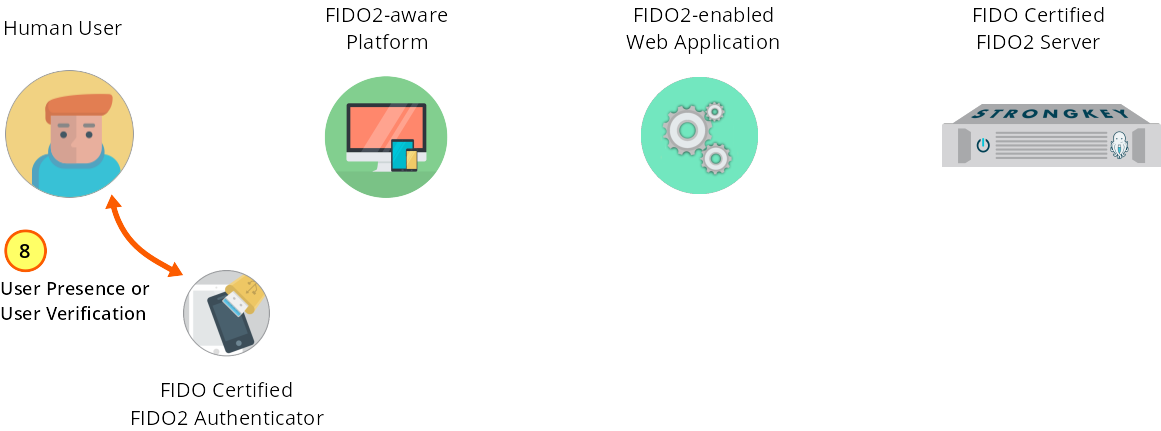
Figure 1—25: Authentication: Test of user presence confirmation from the user.
Upon receiving the challenge and performing internal sanity checks the Authenticator attached to the user’s system will signal the user to confirm user presence by requiring a gesture which may vary by Authenticator—examples might include a button to be pressed, a request for a biometric scan, or a blinking LED. This gesture typically happens by touching the Authenticator.
NOTE: The Authenticator verifies the web application’s site origin matches the credential’s origin against which the key was registered by this user. This is a unique security feature of the FIDO2 protocol to ensure phishing websites cannot activate users’ credentials.
-
Authenticator signs the challenge with user's private key.
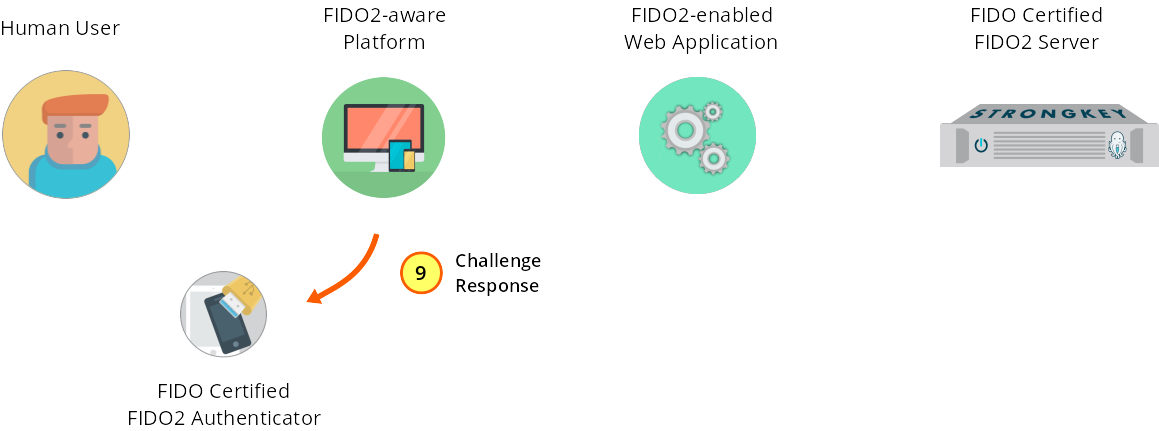
Figure 1—26: Authentication: The Authenticator-signed challenge is sent to the JS front end.
Having received confirmation of the test of user presence, the Authenticator uses the existing credential’s private key, creates additional metadata, and sends the response to the JS in the web application front end.
-
The signed challenge is sent to the service provider's web application back end.
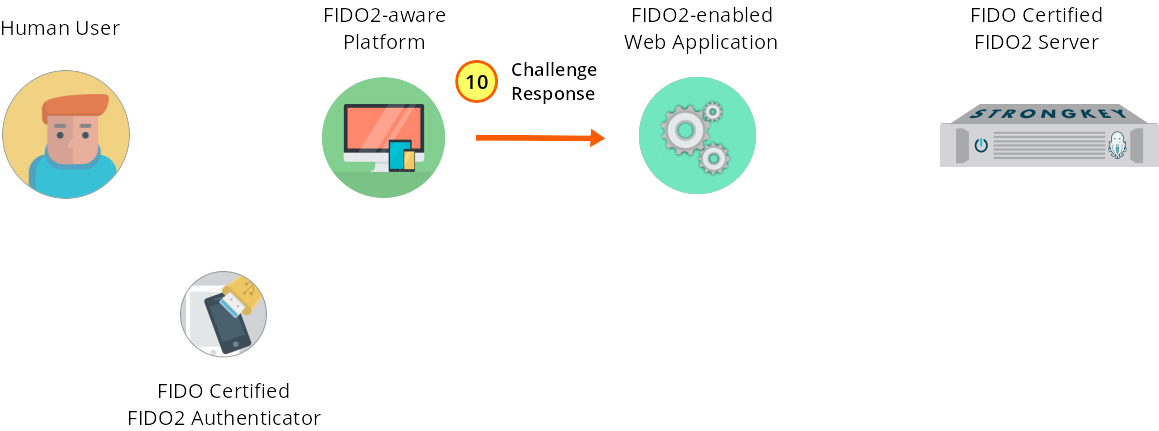
Figure 1—27: Authentication: The signed challenge is sent to the web application back end.
To complete the authentication process, the JS application now must base64url-encode the response from the Authenticator before sending it to the back end of the service provider web application. Earlier-used code is highlit in orange.
// base64url-decode fields to ArrayBuffer format.
  let challengeBuffer = this.preauthToBuffer(preauthResponse);

// The browser passes the challenge to the Authenticator, which requests a signature.
  let credentialsContainer;
  credentialsContainer = window.navigator;
  credentialsContainer.credentials.get({ publicKey: challengeBuffer.Response })
      .then(credResp => {
  // base64url-encode the response from the Authenticator
  let credResponse = that.preauthResponseToBase64(credResp);
  this.post('authenticate', credResponse)
      .done(authResponse => that.onAuthResult(authResponse))
      .fail((jqXHR, textStatus, errorThrown) => {
  this.onFailError(jqXHR, textStatus, errorThrown);
      });
      })
-
The web application calls the authenticate web service on the SKFS.
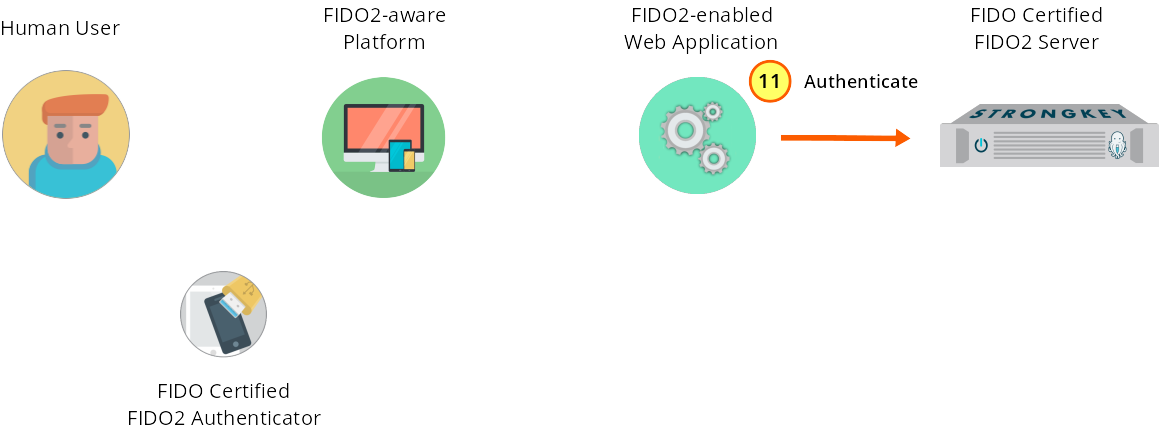
Figure 1—28: Authentication: Web application calls the authenticate web service on the SKFS.
The SKFS authenticate web service must receive this JSON data structure (which is not displayed in full for brevity’s sake); for the full response, see SKFS v3 REST API authenticate Response):
{
  "svcinfo": {
    "did": 1,
    "protocol": "FIDO2_0",
    "authtype": "PASSWORD",
    "svcusername": "svcfidouser",
    "svcpassword": "Abcd1234!"
  },
  "payload": {
    "publicKeyCredential": {
      "id": "WLwV...CuqQ",
      "rawId": "WLwV...CuqQ",
      "response": {
        "authenticatorData": "UoqJ...ABZA",
        "signature": "MEUC...r124",
        "userHandle": "",
        "clientDataJSON": "eyJj...dCJ9"
      },
      "type": "public-key"
    },
    "strongkeyMetadata": {
      "version": "1.0",
      "last_used_location": "Cupertino, CA",
      "username": "johndoe",
      "origin": "https://<FQDN>"
    }
  }
}
The Authenticator response is sent to SKFS via an authenticate web service. The Java code that generates this request is shown below.
public static String authenticate(String username, String origin, JsonObject signedResponse) { JsonObject auth_metadata = javax.json.Json.createObjectBuilder() .add("version", PROTOCOL_VERSION) // ALWAYS since this is just the first revision of the code .add("last_used_location", "Sunnyvale, CA") .add("username", username) .add("origin", origin) .build(); JsonObjectBuilder auth_inner_response = javax.json.Json.createObjectBuilder() .add("authenticatorData", signedResponse.getJsonObject("response").getString("authenticatorData")) .add("signature", signedResponse.getJsonObject("response").getString("signature")) .add("userHandle", signedResponse.getJsonObject("response").getString("userHandle")) .add("clientDataJSON", signedResponse.getJsonObject("response").getString("clientDataJSON")); JsonObject auth_response = javax.json.Json.createObjectBuilder() .add("id", signedResponse.getString("id")) .add("rawId", signedResponse.getString("rawId")) .add("response", auth_inner_response) // inner response object .add("type", signedResponse.getString("type")) .build(); JsonObjectBuilder payloadBuilder = Json.createObjectBuilder() .add("publicKeyCredential", auth_response) .add("strongkeyMetadata", auth_metadata); return callSKFSRestApi( APIURI + Constants.REST_SUFFIX + Constants.AUTHENTICATE_ENDPOINT, payloadBuilder); } ...
private static String callSKFSRestApi(String requestURI, JsonObjectBuilder payload){ JsonObjectBuilder svcinfoBuilder = Json.createObjectBuilder() .add("did", SKFSDID) .add("protocol", PROTOCOL) .add("authtype", Constants.AUTHORIZATION_HMAC); JsonObject body = Json.createObjectBuilder() .add("svcinfo", svcinfoBuilder) .add("payload", payload).build(); ... -
SKFS verifies the challenge response and updates relevant metadata.
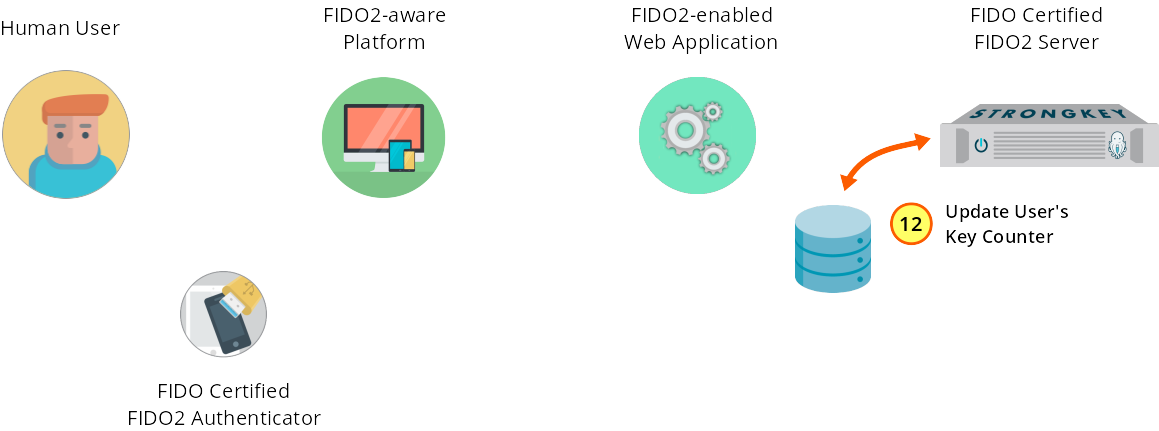
Figure 1—29: Authentication: SKFS verifies the challenge response and updates the key counter.
SKFS verifies the challenge using the public key that was stored for the user during registration.
-
SKFS returns a success message to the web application.
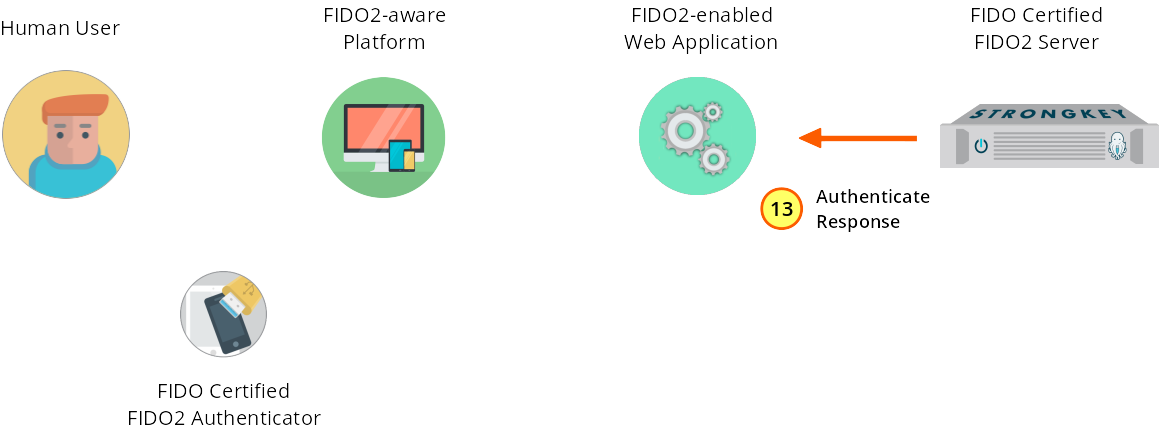
Figure 1—30: Authentication: SKFS returns a success response.
If verification succeeds, the FIDO2 Server returns a success message to the service provider web application.
-
The service provider web application performs post-success housekeeping.
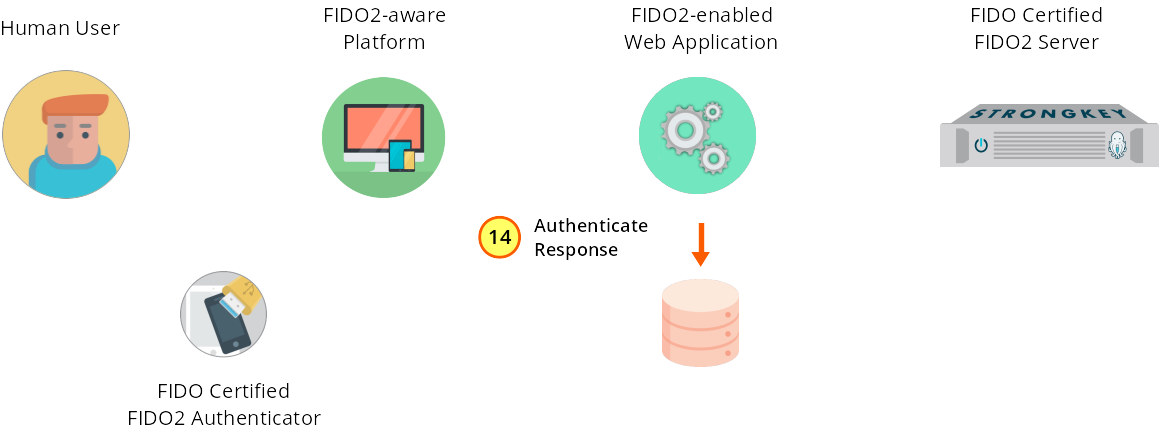
Figure 1—31: Authentication: The service provider web application stores the response.
Upon successfully FIDO2-authenticating a user, the web application may perform additional processing tasks; for example:
-
establishing a sessionID
-
determining the user’s authorization(s) within the applications
-
updating application-level metadata
-
-
The service provider web application returns the success response to the JS front end.
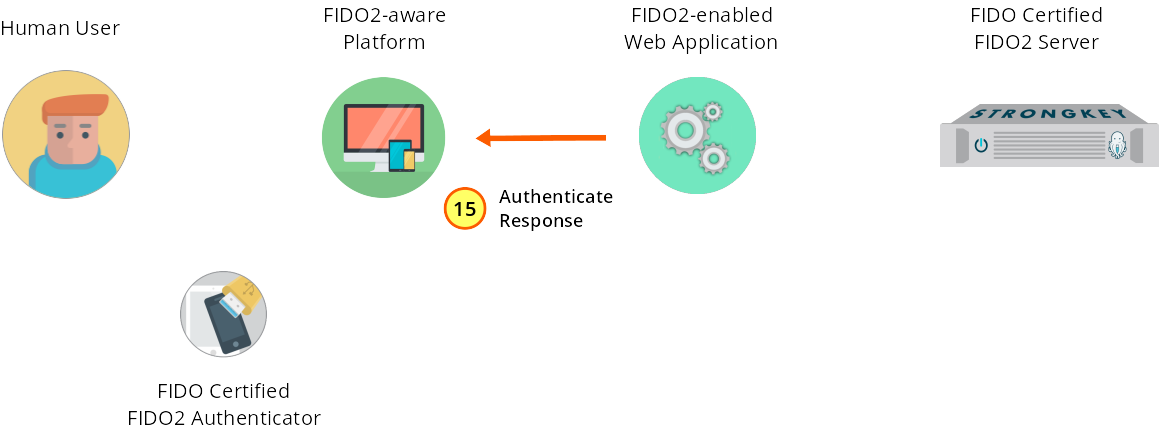
Figure 1—32: Authentication: The web application sends the response to the JavaScript front end.
The message received (typically an HTTP 200 OK by the web application front end is in response to its own authenticate web service.
-
Success! The user is notified of a successful FIDO2 login.
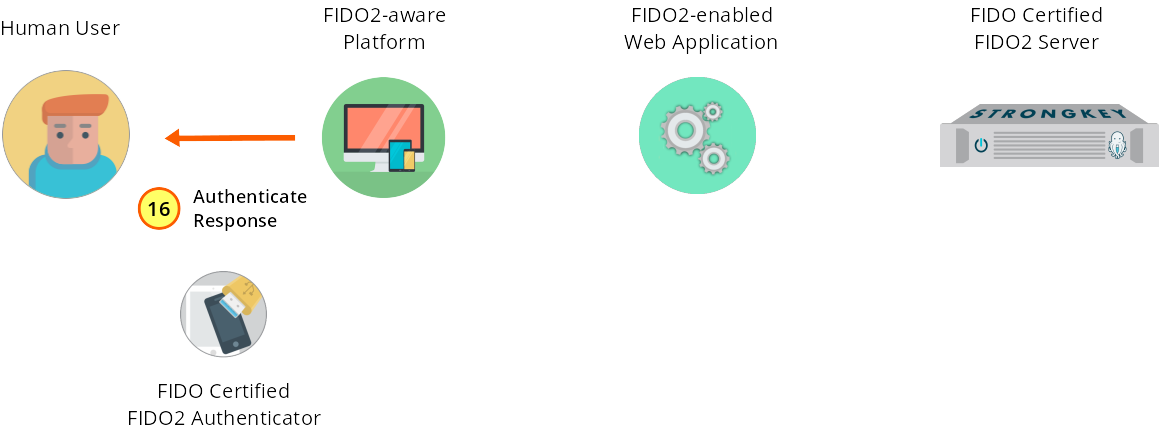
Figure 1—33: Authentication: FIDO2 login is successful!