Changing a Yubikey 5C NFC PIN
The Security Key is a very powerful cybersecurity device and represents the state-of-the-art in multi-factor authentication (MFA) technology that does not use any passwords. The MFA is supported by the:
- Possession factor – where the physical possession of the Security Key is essential to the authentication process;
- Knowledge factor – where know the PIN to the Security Key is also essential to the authentication process.
Since the Security Keys provided with the SB2 use two different NIST-approved, passwordless authentication protocols, there are two containers for the cryptographic keys used with the protocols. Each container is managed by a separate PIN.
However, StrongKey recommends using the SAME PIN to both containers of the Security Key to reduce the burden on users. As long as the Security Key is safely in the possession of the legitimate user, and the legitimate user is NOT sharing the PIN to the Security Key with anyone, the user will be complying with one of the strictest security policies recommended for access control.
This document outlines the process for changing the two required PINs – one for the PIV certificate and the other for the FIDO credential.
AP1 Prerequisites
- Windows 11
- Yubikey 5C NFC
- Yubico Authenticator Application
- Internet connection
- USB-C port or USB-C-to-USB-A adapter
AP2 Open the Yubico Authenticator Application
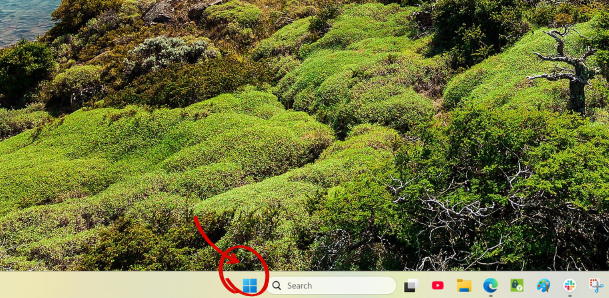
To begin, access the Yubico Authenticator application by selecting the Windows start icon from the Windows taskbar.
AP3 Select Yubico Authenticator
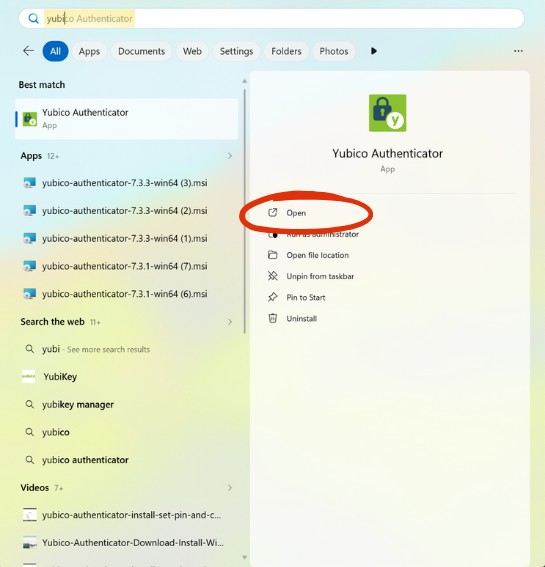
Search for Yubico Authenticator and click Open when it appears.
AP4 The Yubico Authenticator Application
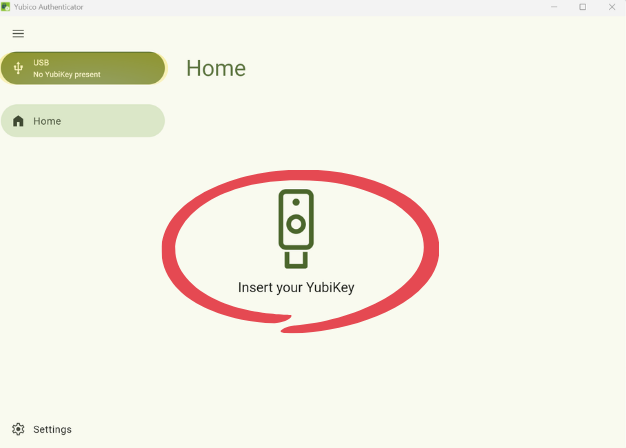
When you open the application, it displays the messages 'No YubiKey present' and 'Insert Your YubiKey'.
Note
If the 'No YubiKey present' message is not visible, expand the application window to ensure all navigation options are clear.
AP5 Insert the Yubikey 5C NFC
Plug the Security Key into the USB-C port.
AP6 Identifying the USB-C Port
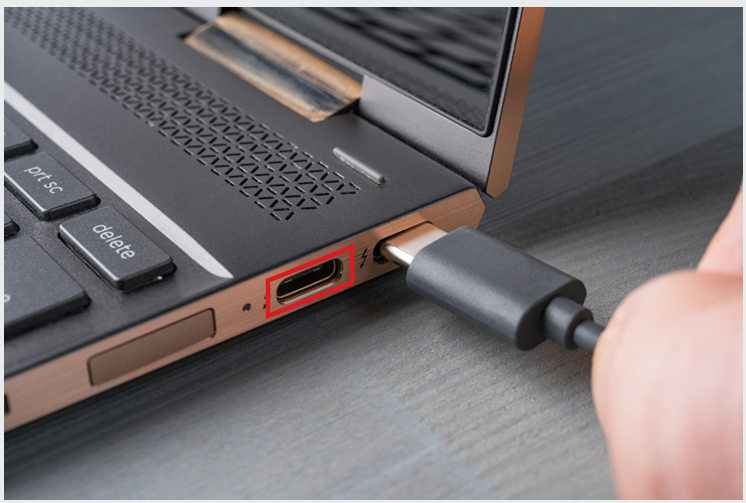
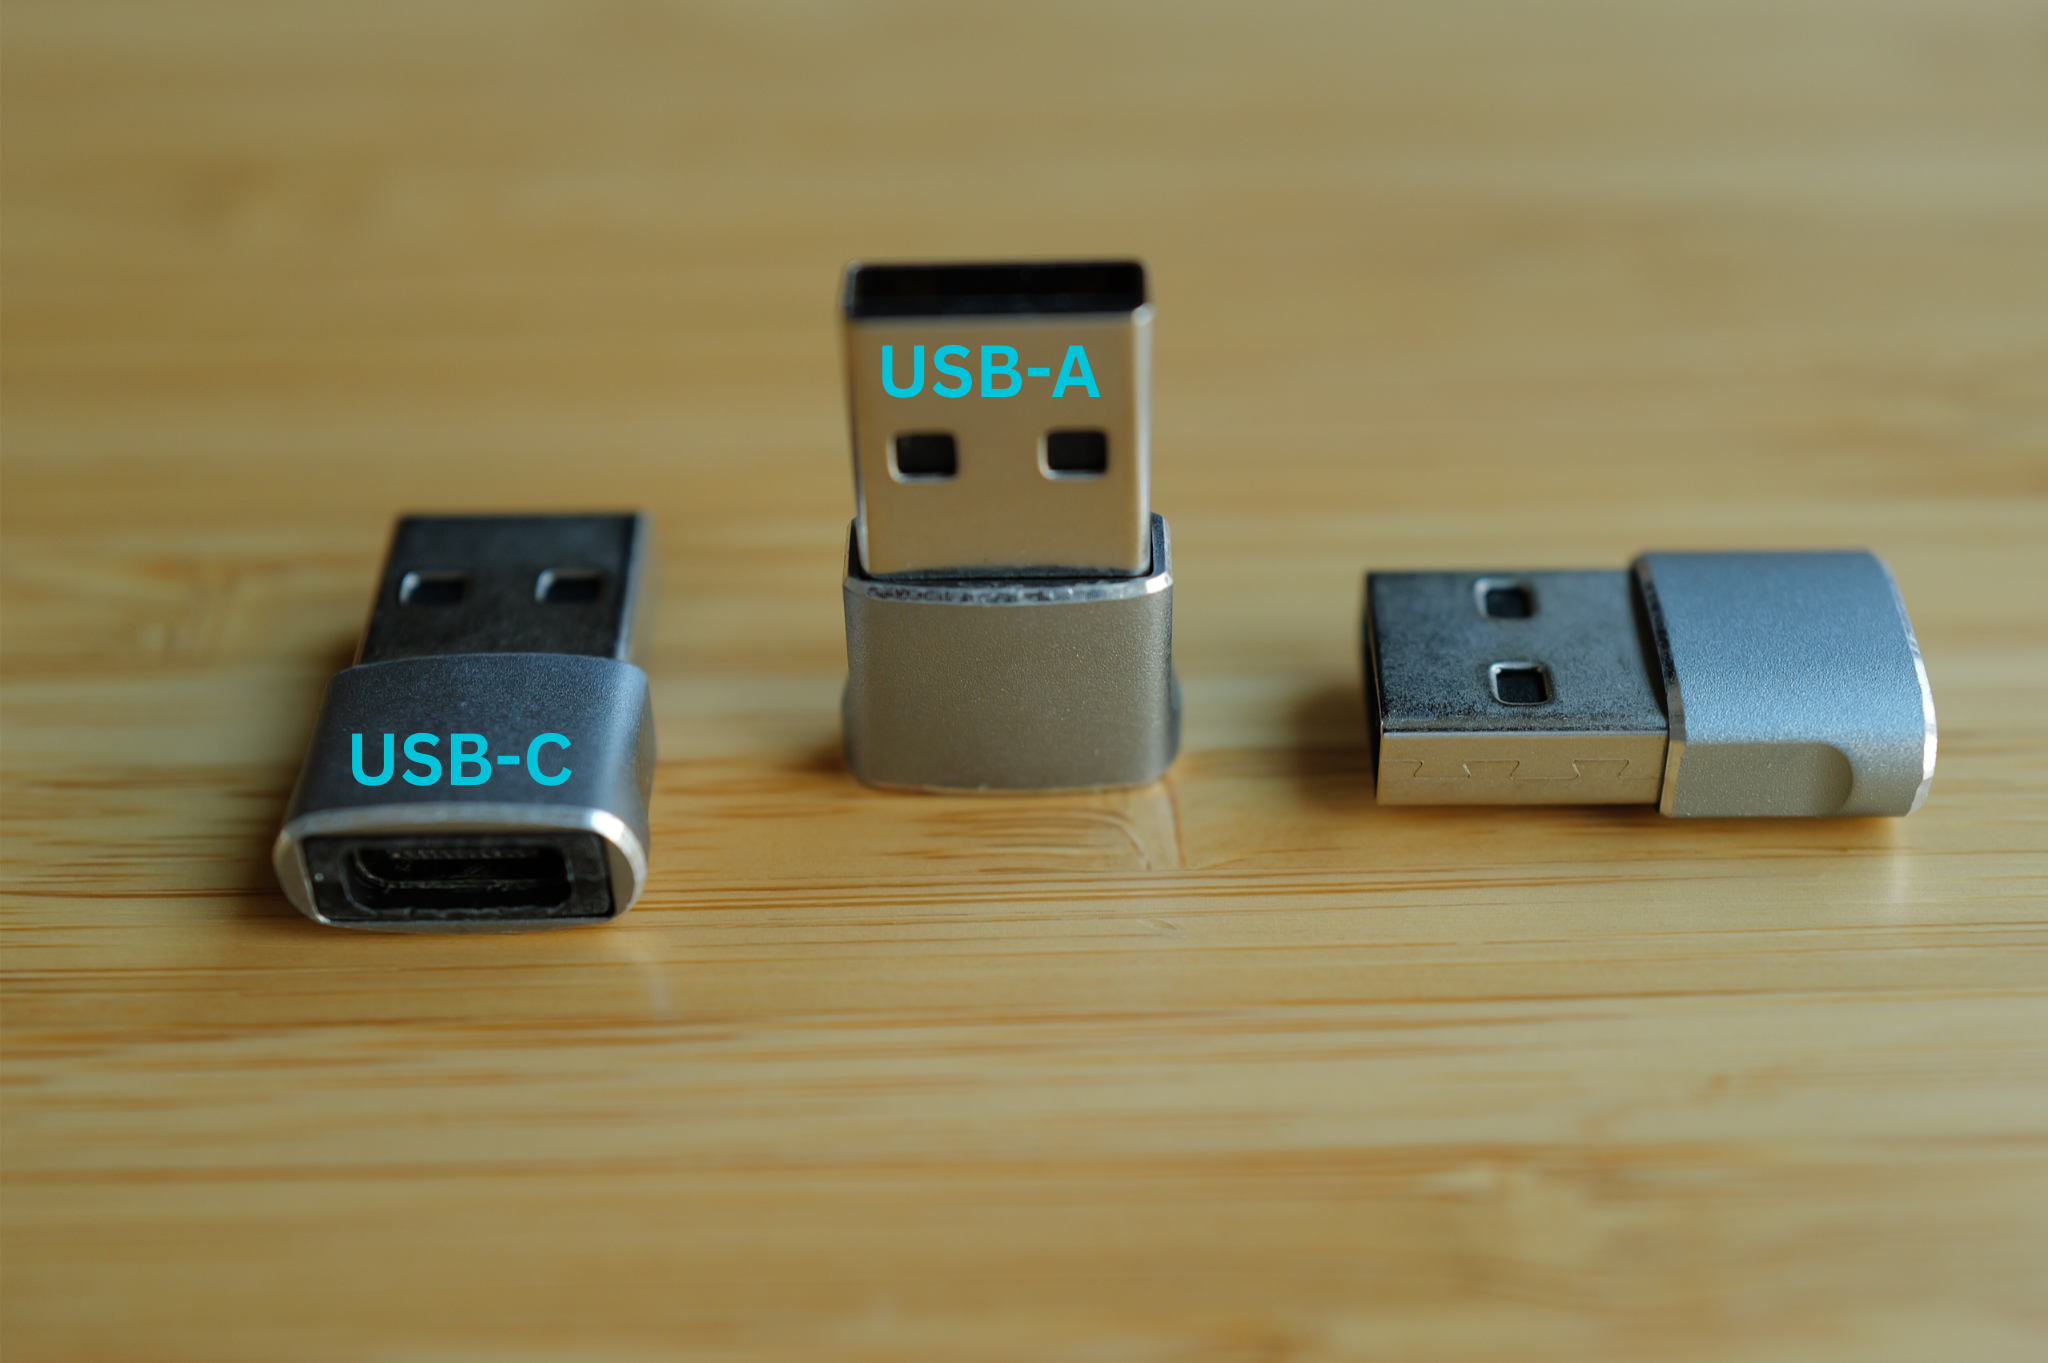
Locate the USB-C port—typically found along the edge of the computer, it features a compact design with smooth, rounded corners that set it apart from traditional USB-A ports. The image below shows both a USB-C port and its matching male connector.
AP7 No USB-C Port? No Problem
With the provided USB-A to USB-C adapter, simply plug the USB-A end into the computer and insert the Security Key into the USB-C port.
The provided USB adapter pictured below.
AP8 Changing the Digital Certificate PIN
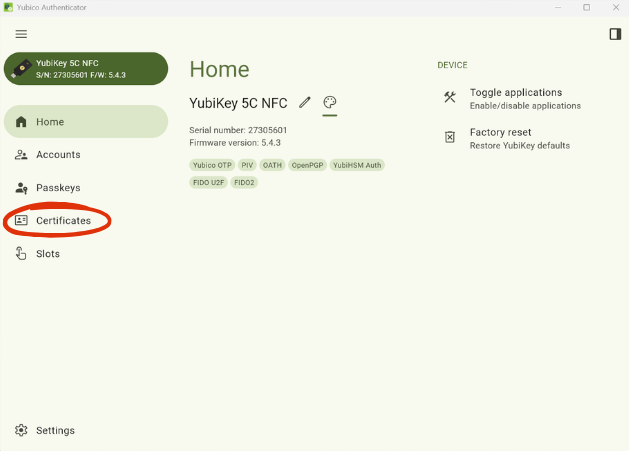
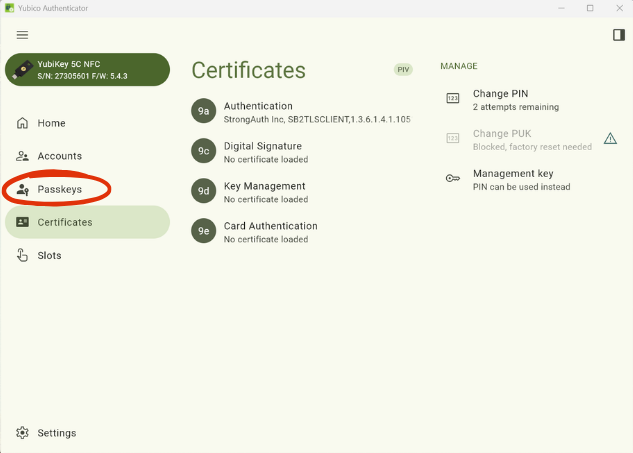
Plugging in the key loads the home screen. Navigate to the left and click the Certificates icon from the menu.
AP9 Change PIN Option
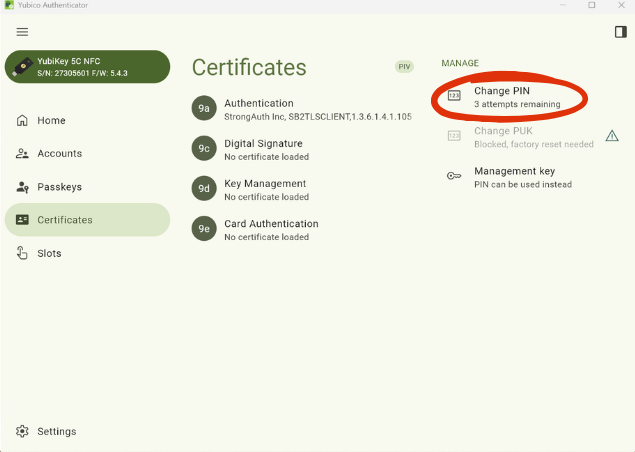
Select the Change PIN option from the Manage menu on the right.
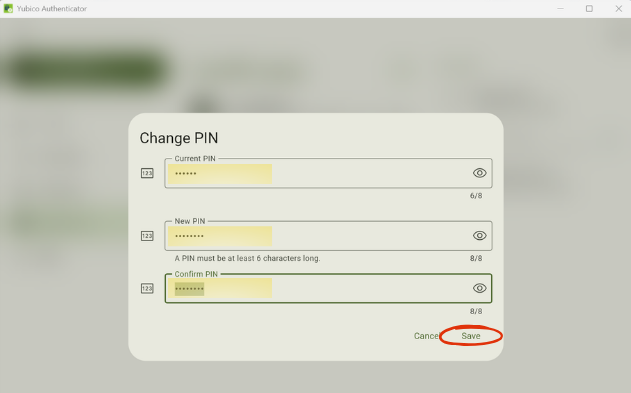
AP10 Enter PIN Information
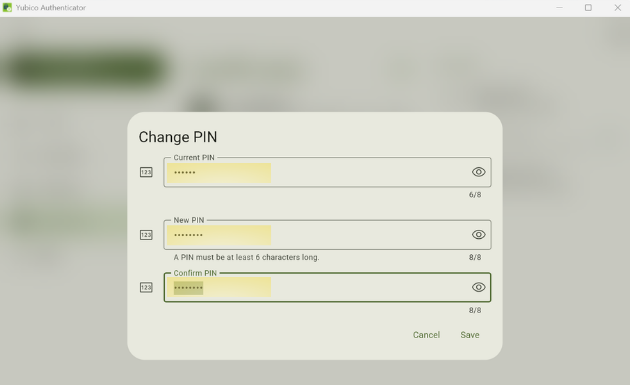
- In the top field, enter the default PIN: 123456.
- Enter the new PIN in the middle field. The PIN must contain 6 to 8 characters.
- Re-enter the new PIN in the final field to confirm.
AP11 Save New PIN
Click Save. The application returns to the previous screen. If the process is successful, a “PIN changed” notification briefly appears at the bottom of the screen.
AP12 Changing the FIDO Credentials PIN
To update the second PIN, click on the Passkeys menu option to the left.
Note
StrongKey recommends using the same PIN for the Security Key.
AP13 Passkeys Menu
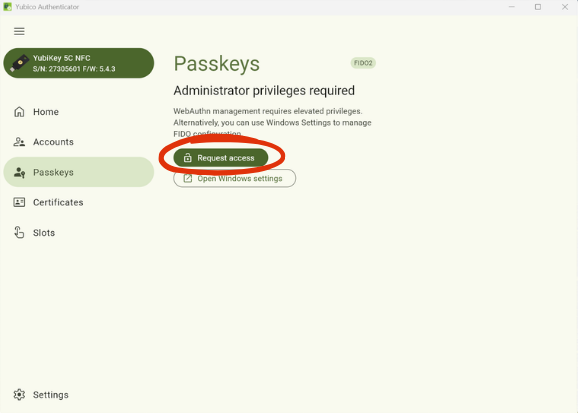
In the Passkeys menu, select Request Access.
AP14 Yubico Authenticator Application Permission
The Yubico Authenticator application will ask Windows for permission to implement changes on the computer. Click yes.
AP15 Change PIN Option
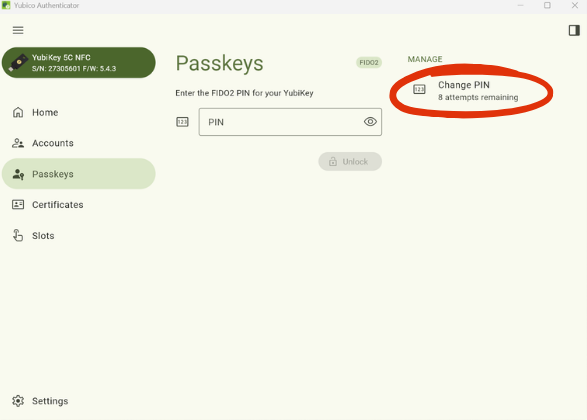
Select the Change PIN option located on the right of the screen.
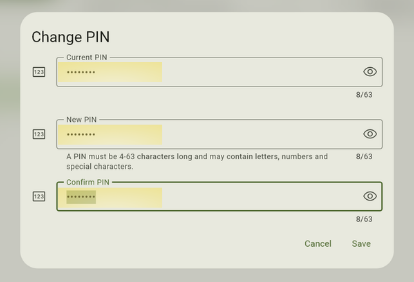
AP16 Enter PIN Information
- In the text field marked Current PIN type in your current PIN. If you have not changed it, it is 123456 by default.
- In the text field marked New PIN enter a new PIN of your choice. It must be a minimum of 6, and up to 63 characters.
- In the text field marked Confirm PIN enter the same PIN you selected.
AP17 Success!
The display will return to the Passkeys menu, and a notification stating "PIN Reset" will briefly appear at the bottom of the screen.