Importing SB2 Root CA and Subordinate CA Certificates into Truststore
When using Security Keys with digital certificates for authentication to an SB2 site, the SB2 Root Certificate Authority (CA) certificate of the site is a critical component in establishing trust between your browser and the site. It ensures the digital certificate on your Security Key was issued by that SB2 site and is currently valid.
B1 Prerequisites
- MacOS 13 and above
- Safari 26.0.1
- Internet Connection
B2 Access the SB2 PKI Portal
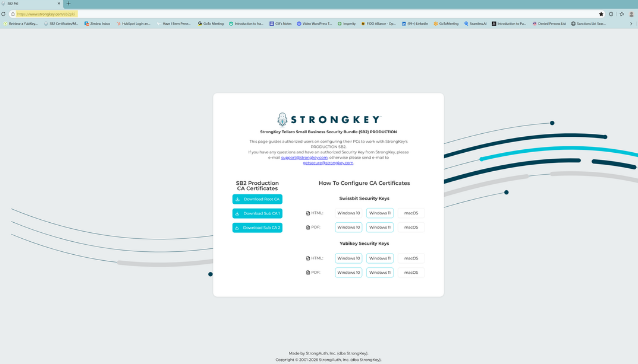
All required CA certificates are available for download from the SB2 PKI landing page at https://www.strongkey.com/sb2pki.
B3 SB2 CA Certificates
Next, download the three SB2 Production CA certificates from the left side of the page.
Note
Download the certificates starting with the Root CA.
B4 Downloading the SB2 Root CA
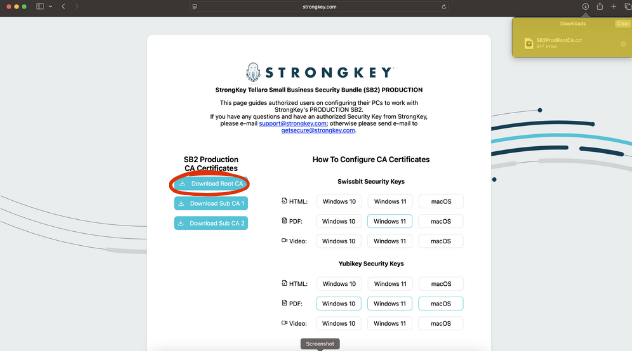
First, click the Download Root CA button. The download will begin automatically, and you’ll see a dialog box confirming the file name once the process is complete.
REPEAT this process for the Sub CA 1 and Sub CA 2 certificates.
B5 Access macOS Finder
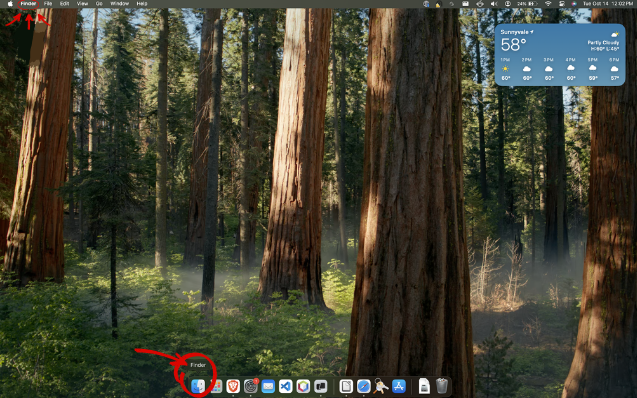
To get started installing the certificates, open the Finder application by clicking its icon in the Dock or by selecting it from the menu in the upper left corner of your screen.
B6 Locate Downloaded SB2 RootCA File
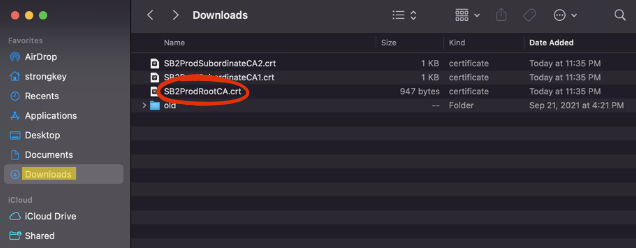
Navigate to the Downloads folder in Finder. Locate the SB2 Root CA file and right-click it.
Note
Please note that your specific SB2 certificate files may have a different name. Ensure you know the correct file name before proceeding.
B7 Open Keychain Access
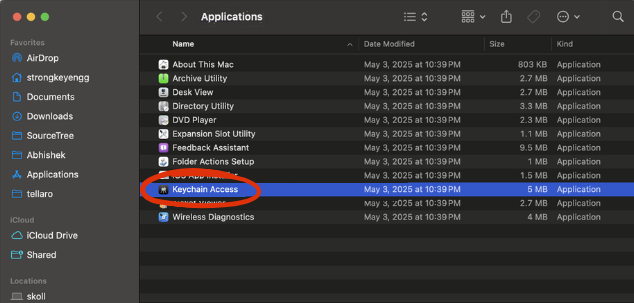
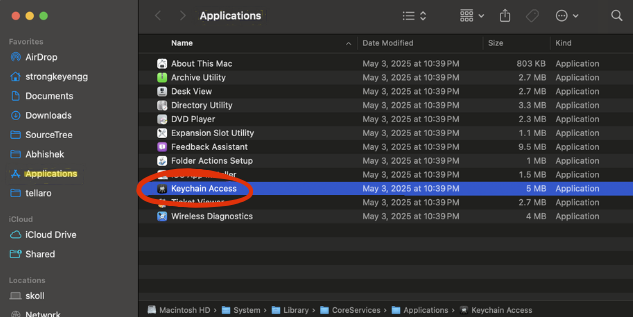
Launch Keychain Access by searching with Spotlight [⌘ + Space] (refer to Image 1), or by navigating to Applications in Finder (see Image 2).
Image 1
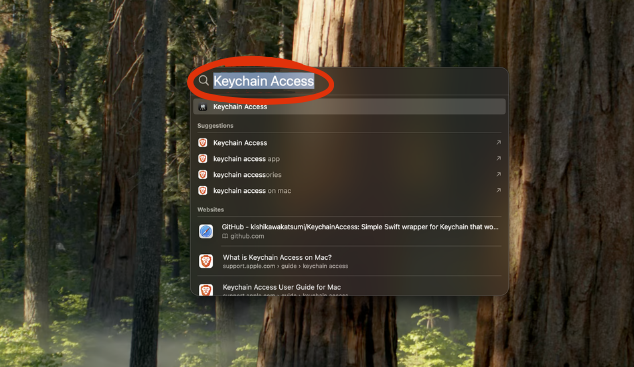
Image 2
B8 Navigating in the Keychain Access Application
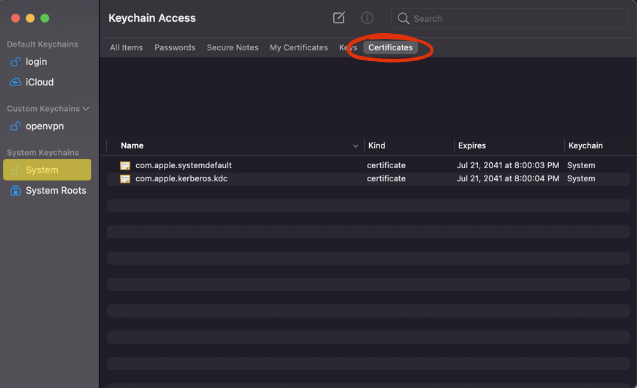
After launching the KeyChain Access application, the following screen appears. Select System in the sidebar, followed by Certificates in the top menu.
B9 Importing Certificates
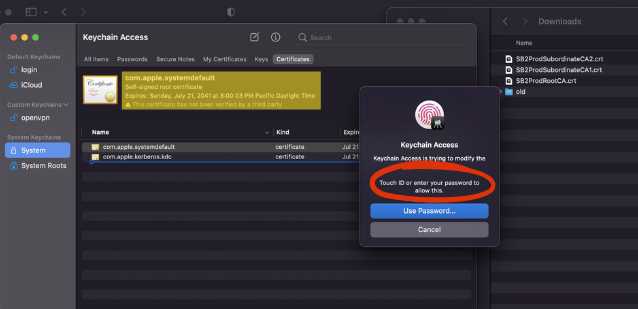
Next, drag the Root Certificate into the Keychain Access window to begin the certificate import process. The macOS will prompt you to authenticate using Touch ID or an account password to complete the import.
B10 Access the SB2 RootCA Certificates
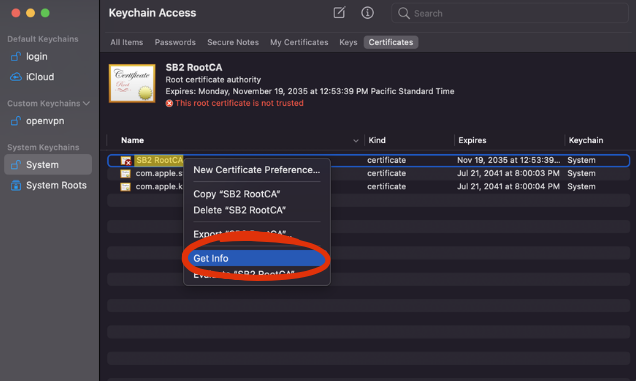
Right-click on the imported SB2 RootCA certificate, then select Get Info to view its details.
B11 Trust the SB2 RootCA Certificate
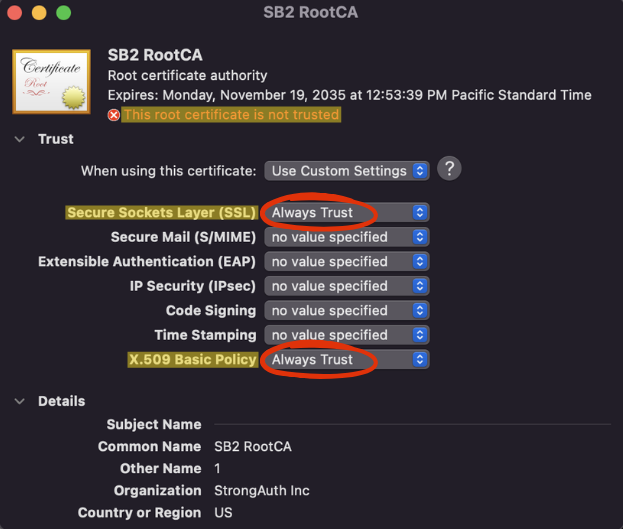
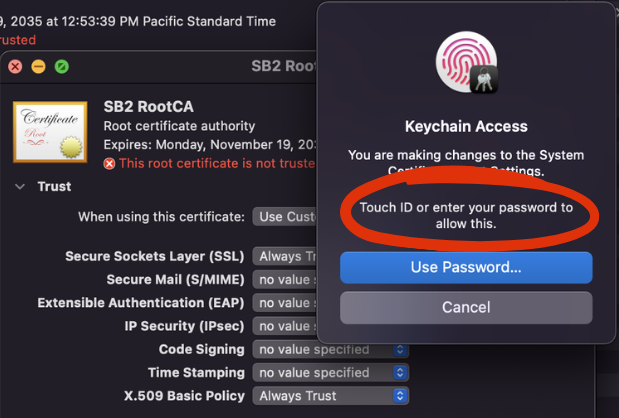
To view the Trust details, click the down arrow next to the Trust option. Then, select Always Trust for both Secure Sockets Layer (SSL) and X.509 Basic Policy.
B12 Authenticating the Changes to the SB2 RootCA Certificates
After the SB2 RootCA Get Info window is closed, macOS prompts for authentication, using either Touch ID or the macOS account password, to confirm changes to the Trust settings.
B13 Confirming the Trust Changes
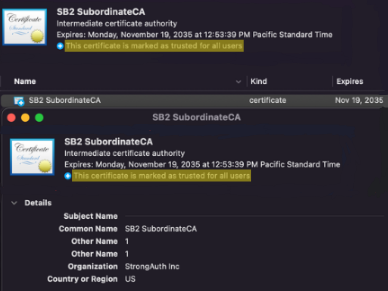
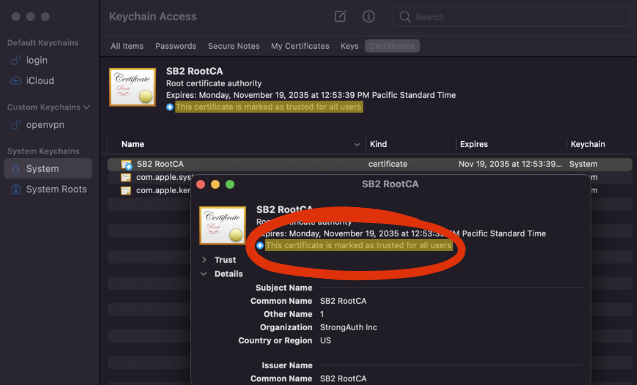
Click Next to continue. To confirm the trust settings, right-click the SB2 RootCA certificate and select Get Info. A successful import and trust is indicated by the message: “This certificate is marked as trusted for all users.”
B14 Accessing the Downloaded Subordinate Root Certificate Files
To get started, launch Keychain Access by searching with Spotlight [⌘ + Space] (refer to Image 1), or by navigating to Applications in Finder (see Image 2).
Image 1
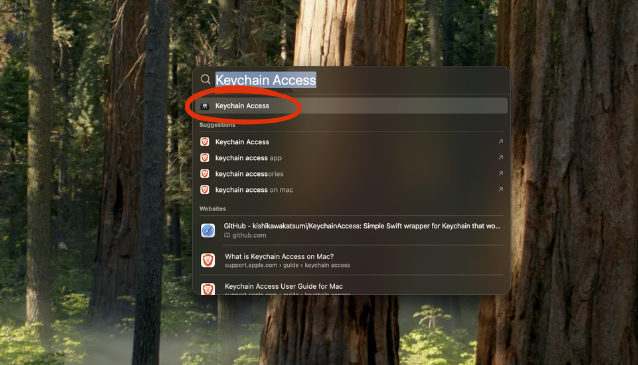
Image 2
B15 Navigating in the Keychain Access Application
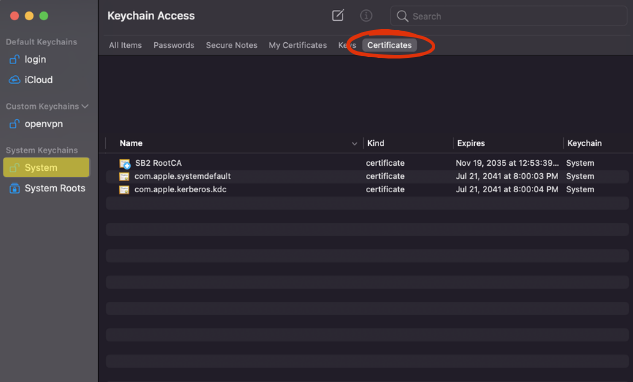
After launching the KeyChain Access application, the following screen appears. Select System in the sidebar, followed by Certificates in the top menu.
B16 Importing Certificates
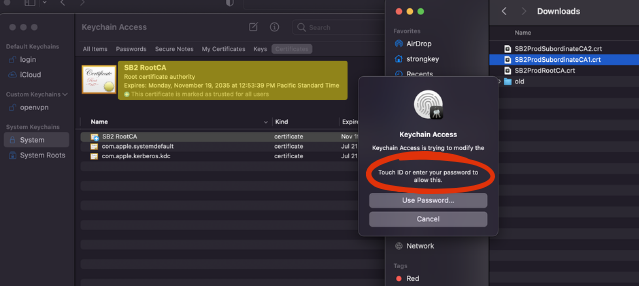
Next, drag the SB2-SubordinateCA.crt file into the Keychain Access window to begin the certificate import process. The macOS will prompt you to authenticate using Touch ID or an account password to complete the import.
B17 Access the SB2 Subordinate CA Certificate Details
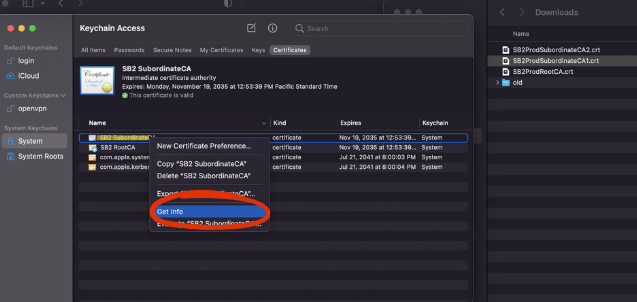
Right-click on the imported SB2 SubordinateCA certificate, then select Get Info to view its details.
B18 Trust the SB2 Subordinate CA Certificate
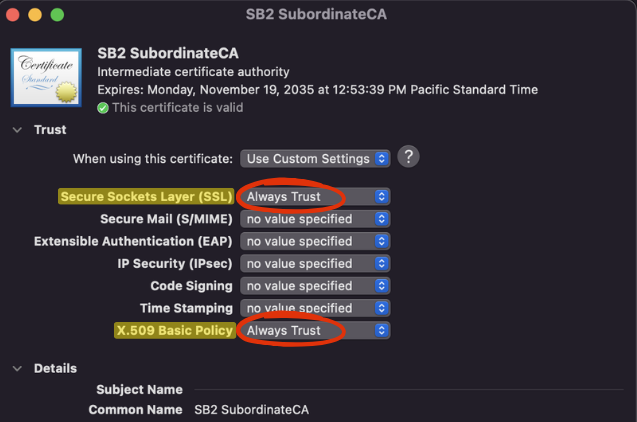
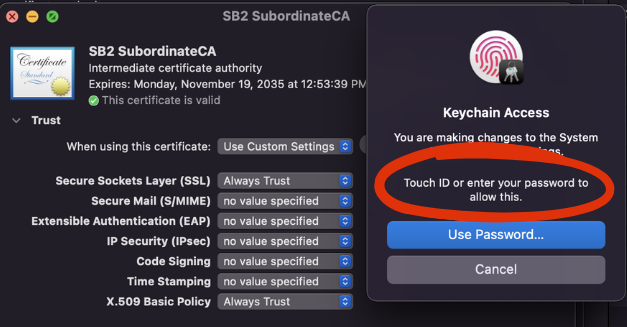
To view the Trust details, click the down arrow next to the Trust option. Then, select Always Trust for both Secure Sockets Layer (SSL) and X.509 Basic Policy.
B19 Authenticating the Changes to the SB2 Subordinate CA
After the SB2 SubordinateCA Get Info window is closed, macOS prompts for authentication, using either Touch ID or the macOS account password, to confirm changes to the trust settings.
B20 Confirming the Trust Changes
To confirm the trust settings, right-click the SB2 SubordinateCA certificate and select Get Info. A successful import and trust is indicated by the message: “This certificate is marked as trusted for all users.”