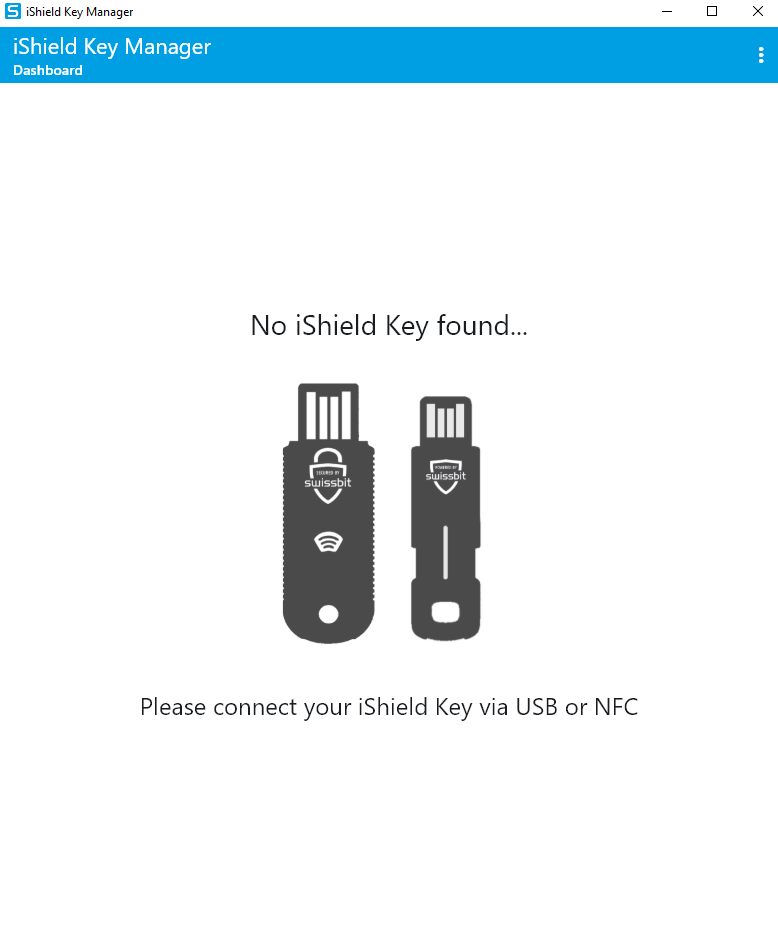
Installing The Swissbit iShield Key Manager
The Swissbit iShield Key Manager is necessary to access and configure the Swissbit iShield Key 2 Pro MIFARE Security Key’s settings and features. Make sure you familiarize yourself with the process before beginning the installations.
A1 Prerequisites
- MacOS 13 and above
- Safari 26.0.1
- Internet connection
A2 Download Swissbit iShield Key Management Kit: Part 1
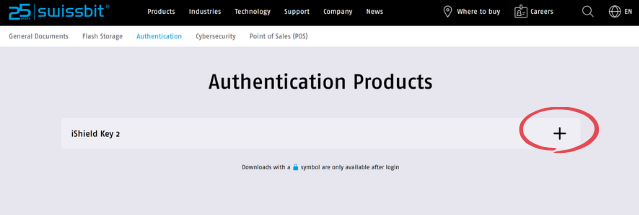
To download the iShield Key Management Kit for macOS, go to https://www.swissbit.com/en/my-swissbit/download-center. Next, scroll down to Authentication Products and expand by clicking the plus icon.
A3 Download Swissbit iShield Key Management Kit: Part 2
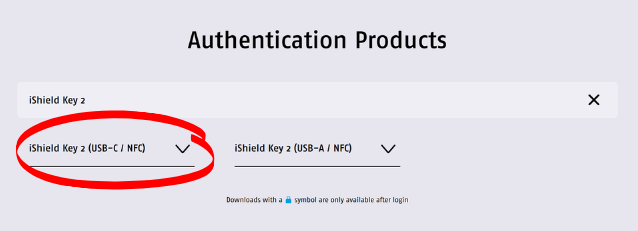
Select iShield Key 2 (USB-C / NFC) and click the down arrow.
A4 Download Swissbit iShield Key Management Kit: Part 3
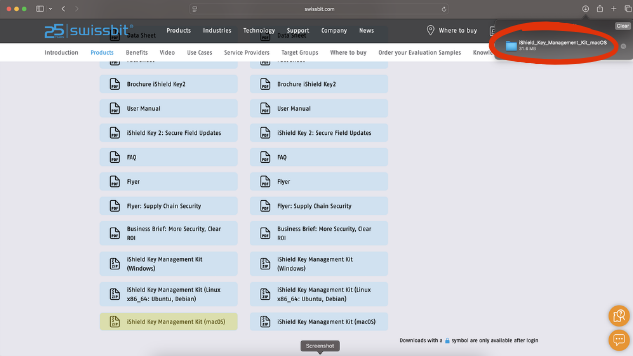
Download the iShield Key Management Kit (macOS) zip file by clicking the link. When Safari displays a pop-up confirming the download, double-click the blue file to initiate install.
A5 No Pop-Up Window? No Problem.
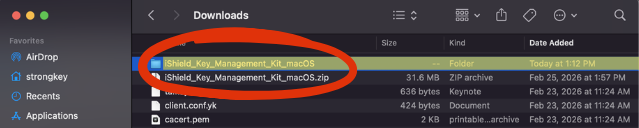
If the pop-up does not appear, or is inadvertently closed, access the downloaded file by using Finder to access Downloads. Double-click the iShield Key Management Zip file to extract the files.

A6 Extracted Files
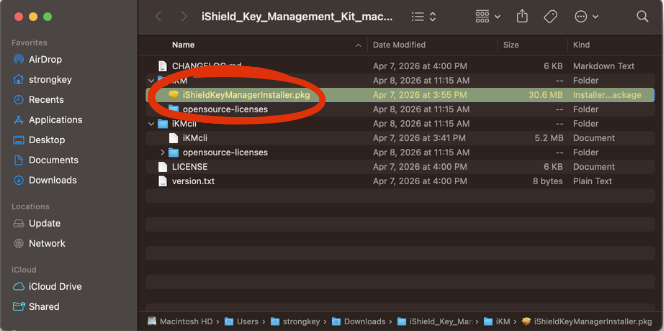
Double-clicking the zip file initiates a macOS Archive Utility that automatically extracts the contents of the file. The extracted “iShield” folder appears above the zip file. Double-click the new folder to access the iShieldKeyManagerInstaller.pkg.
A7 Initiate iShield Installer
Double-click the iShieldKeyManagerInstaller.pkg.
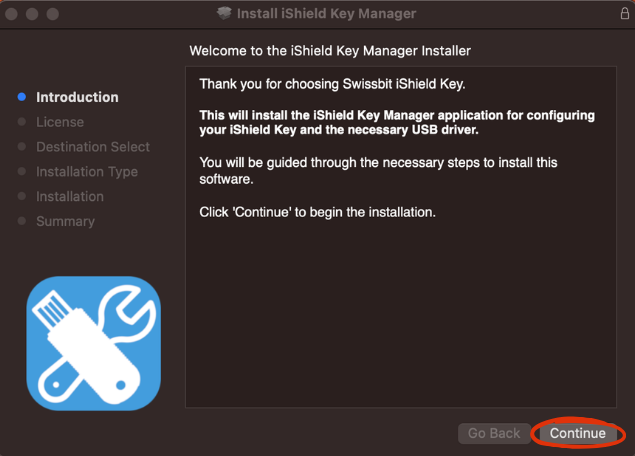
A8 iShield Install
Follow the on-screen prompts to install the iShield Key Manager. Click Continue.
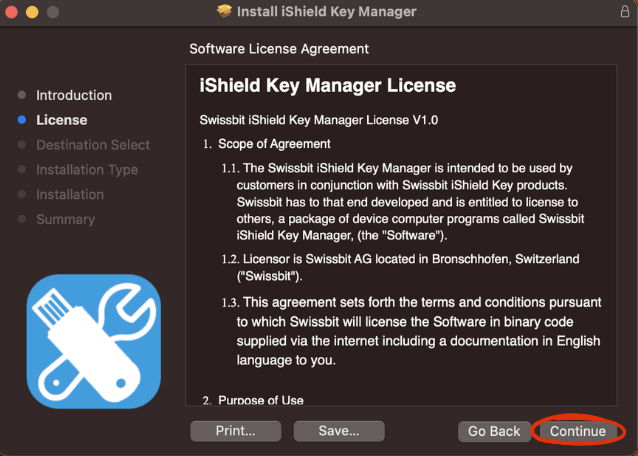
A9 iShield Key Manager License
Click Continue to accept the license agreement.
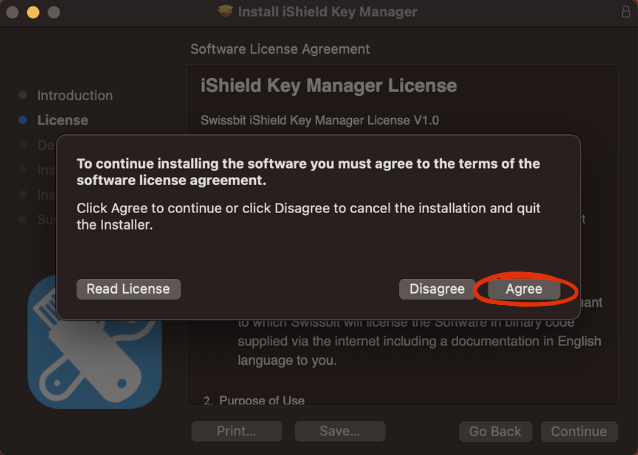
A10 License Agreement
Click Agree to accept agreement and continue installation.
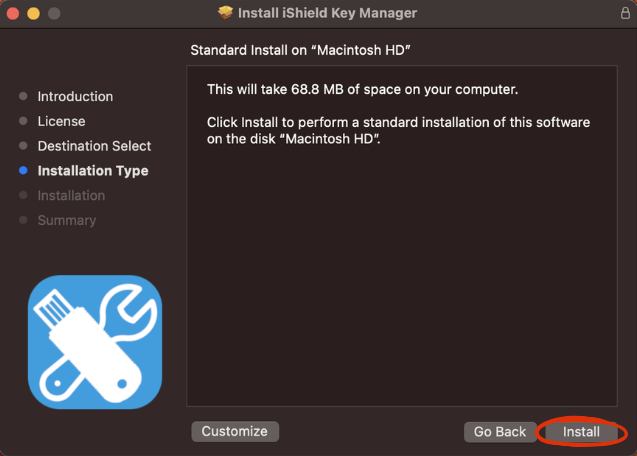
A11 Installation Type
Verify Installation Type is Standard. Click Install.
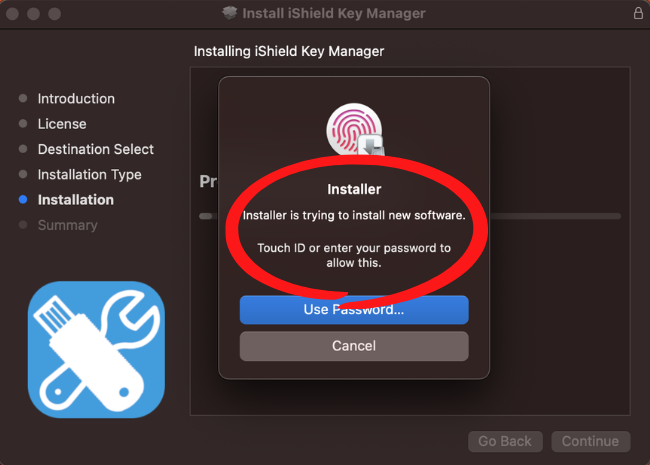
A12 Authenticate to Install: Part 1
To continue installation, authenticate using Touch ID or Password. The document example will use a password.
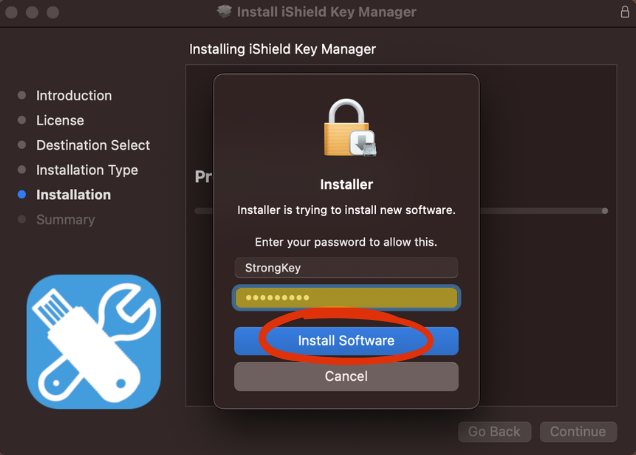
A13 Authenticate to Install: Part 2
Enter your password and click Install Software.
A14 The Install
When the installation is complete (progress bar will turn blue), the Continue button will activate -- click it.
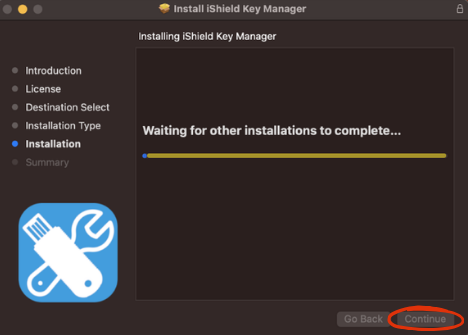
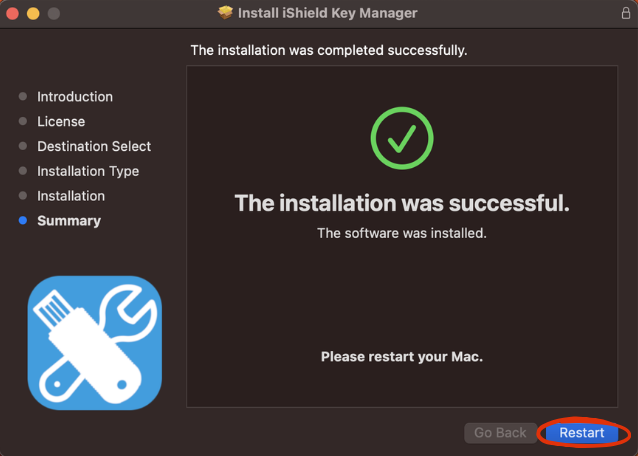
A15 Successful Installation
After the iShield Key Manager installs successfully, your computer will prompt you to restart. Please save all open documents before proceeding.
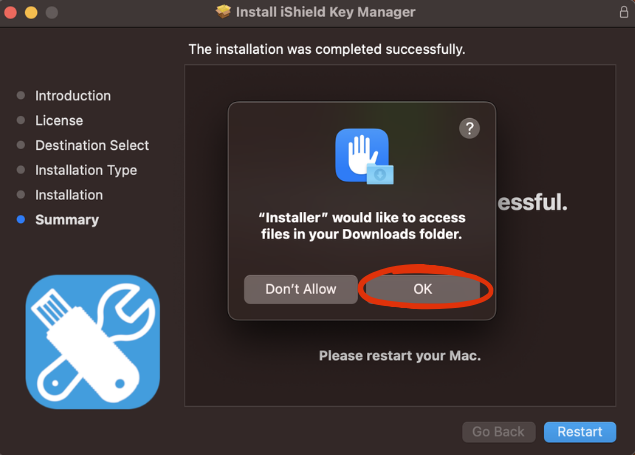
A16 Allow Access
Click OK to continue.
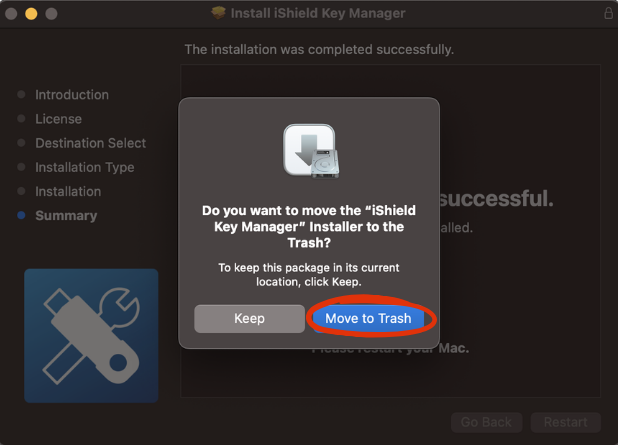
A17 Delete the Installer
Click the Move to Trash button.
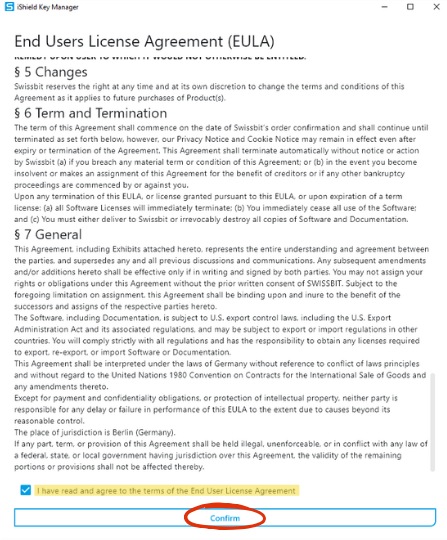
A18 End User License Agreement
Check the box that you have read and agree to the terms of the End User License Agreement and click Confirm.
A19 Restart Computer
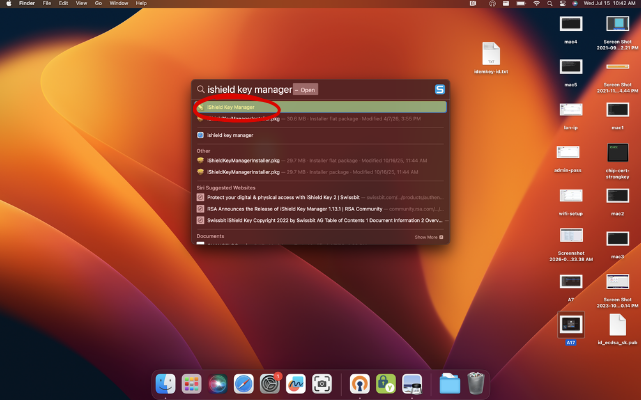
After the install is complete, save any open documents and restart the computer. Next, re-open the iShield Key Manager.
A20 Success
The iShield Key Manager is now ready to use.